6 Go-To Lighting Setups Portrait Photographers Swear By

Lighting is one of the most important aspects of photography. Whether you’re working with natural light, flash, or continuous lighting, understanding how to shape light can make all the difference in your shots. In this post, I’ll walk you through some of my favorite lighting setups and techniques that you can replicate on your next shoot!
Creating Rain with Light
For this shoot, we decided to fake the rain using a garden hose in the front yard. Shooting later in the day allowed us to get the light behind the raindrops, making them more pronounced and visually stunning.
To add depth and drama, I introduced color into the background by using flash with blue, pink, and purple gels. This technique worked beautifully with Juliana’s bright blue eyes, making them pop against the moody background. To get crisp raindrop details, I shot at f/5 instead of f/1.8 and used the Canon R6 Mark II along with Profoto A10 to illuminate the scene.


Turning Day into Night
Did you know you can make a daylight scene look like nighttime with just a few simple tweaks? Here’s how:
-
Adjust the White Balance – Lowering the white balance in-camera gives the scene a cool, blue tone, mimicking nighttime lighting.
-
Underexpose the Background – I set my exposure so the background appears darker, creating a nighttime illusion.
-
Use Flash with CTO Gels – By adding CTO (Color Temperature Orange) gels on my Profoto B10, I warmed up my subject while keeping the background cool and moody.
This trick is a game-changer when you want to transform a bright outdoor setting into an atmospheric night scene!


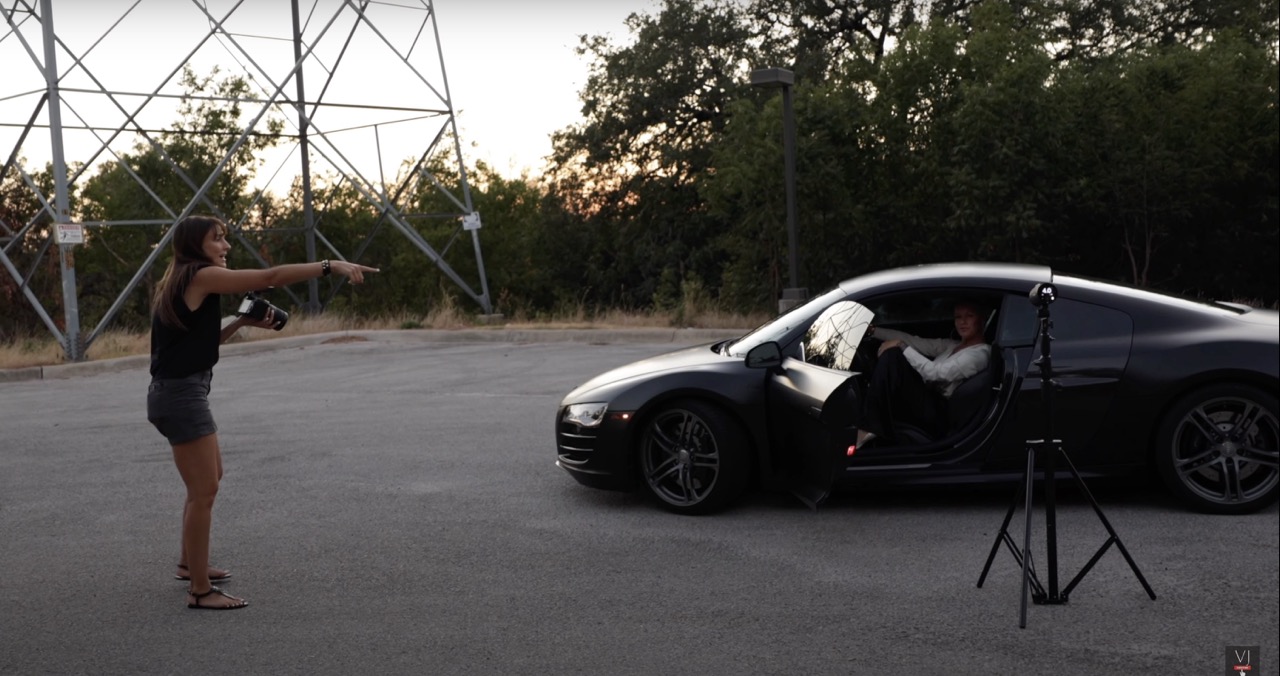
Boss Babe Branding Session
I recently had the pleasure of photographing a branding session for a powerhouse entrepreneur who specializes in hair extensions and braids. The goal was to capture her vibrant personality both in her salon and outside with her stunning Audi.
For the outdoor shots, I used a Profoto A2 with a magnetic click Octa softbox to balance the natural sunset and add a pop of color inside the car. This setup gave us dramatic and eye-catching branding images that truly embodied her energy and confidence.

Hollywood Vibes with Victoria
To create a vintage Hollywood look, I used the Profoto Fresnel modifier on the A2 and A10. This classic modifier produces a crisp, directional beam of light that sculpts the subject beautifully. We shot in black and white to enhance the old-school glamour effect, with precise posing and lighting adjustments to get the perfect shot.


Continuous Light vs. Flash
If you’ve ever debated whether to use continuous light or flash, here’s what you need to know:
-
Continuous Light: Great for seeing your lighting setup in real-time, but it has limited power, making it less effective outdoors.
-
Flash: Much more powerful, allowing you to control exposure and lighting ratios even in bright conditions.
I used the Rotolight AOS2 kit for a creative shoot, leveraging its 16.7 million color options to add dimension and drama. Combining flash and continuous light opens up endless creative possibilities!


Final Thoughts
Lighting can completely transform a scene and elevate your photography to new heights. Whether you’re faking rain, simulating nighttime, or creating Hollywood-style portraits, understanding your light sources is key. Experiment with these setups, have fun, and don’t be afraid to get creative!